My first backpacking trip was memorable, but not for reasons I like to share. The summer after I graduated from high school, two friends and I borrowed packs and sleeping bags. We carried a small pot, a can of Sterno fuel, some semblance of a map and a true sense of adventure.
Unfortunately we didn’t have a clue what we were doing. Fortunately, we survived.
I laugh now at the mistakes we made, like camping within feet of the only water source in the area during a dry August, resulting in a visit by many critters and very little sleep on our part. We chose to take a “short cut” through the forest; why would you go the long way around a loop when you could cut it off in the middle? Ending up on the side of a mountain with huge boulders to navigate, we realized there was a reason the trail didn’t go there. We also spent a lot of time wondering why we were carrying half of the items in our packs.
Later on I sought out an outdoor club and learned the fundamentals from people who knew what they were doing. I gradually built up skills and confidence, and eventually became an Outward Bound Instructor. Backpacking became a life-long love, and a way to see amazingly beautiful landscapes that you can’t access any other way.
Backpacking is one of the main activities on many Outward Bound courses. Whether you hike the Appalachians or the mountains of Colorado, you’ll learn all the basics of backpacking, and you’ll soon feel right at home, like a turtle, with everything thing you need on your back.
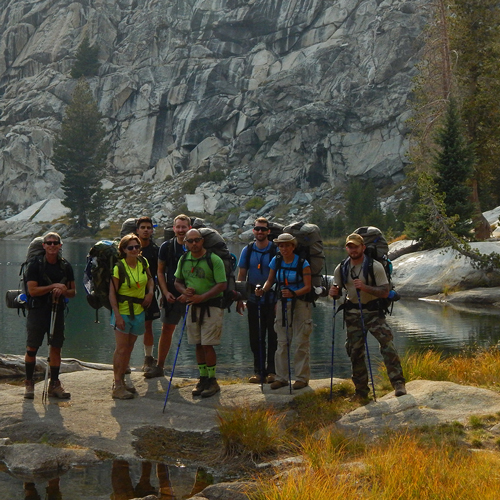
Many Outward Bound courses offer opportunities to learn backpacking skills and see diverse and beautiful landscapes.
If you are thinking of going out backpacking, we’ve provided some guidance below so you don’t have to learn the hard way.
Plan Ahead to Maximize Enjoyment
Plan your route. Be conservative about what mileage you might cover at first, as you’ll find with a pack you’ll be much slower than on a day hike with a little weight on your back. Consider 5-10 miles a day as a good starting goal. You may be fine doing more, especially on long summer days, but this will get you going and hopefully allow time to enjoy the trip. It’s no fun to start out with a forced march, trying to reach camp before dark.
Study the map to see what your natural highlights might be. Will you pass near a mountain lake? A section of stream or river? Will you go over a peak, or have vistas along the way? Plan in time to enjoy special places or a nice spot along the trail.
Tip: Note the elevation gain on your planned route. For every 1000 feet you climb, plan on adding an extra hour of hiking time as a rule of thumb.
Have in mind a few possible camp sites. If you make good time, where will you camp? If you are slower than you think, where might you stay? Be sure and camp near water if at all possible, so you don’t have to carry it!
Carrying a pack is hard work. Get in shape before you go out, and break in your boots to prevent serious blister action.
Pack Your Pack with Care
When you sign up for Outward Bound, there’s no need to purchase gear; it is provided on your course. You will need to get the clothing and footwear appropriate for your course, along with personal items, like toiletries and a journal. Your course advisor will send you a list of everything to bring.
Packing a backpack requires some experimentation. As a general rule, put heavy items on the bottom. This tactic helps with comfort, as the weight will be more on your hips. Put some muscle into your packing: squish the sleeping bag and other soft items together, pushing air out. If your insulating sleeping pad is large, it can be attached to the outside of the pack with straps. If it’s fragile (i.e. inflatable), keep it protected in the pack. You don’t want a thorn you encounter in the wilderness to render your pad unusable.
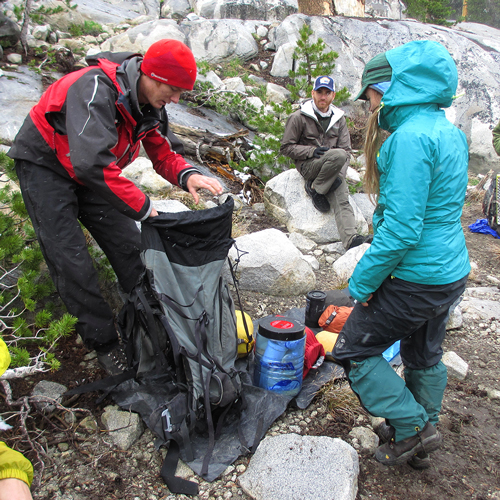
Packing your backpack requires experimentation and a bit of skill, but with some practice you’ll be an expert in no time.
Use either a pack liner – such as a heavy duty garbage or leaf bag – or a nylon pack cover in case of rain. Put the plastic bag in first, then your sleeping bag, cook kit and fuel, and finally your food bag.
Tip: Keep items you’re likely to need during the day in pockets or on top: snacks, water, water purification, sun screen, rain gear, warm layers, map and compass. This way you won’t be emptying your pack every time you need something.
On the Trail
Take regular breaks. This gives your body a chance to adjust to the hard work of carrying extra weight.
Drink plenty of water and regularly throughout the day. A rule of thumb is to drink two quarts of water throughout the day. You may need more than two quarts, depending on how hard you are working and what kind of environment you are hiking in.
Eat regular snacks. Backpacking is not the time to go on a diet! Keep snacks handy and nibble at breaks. Reach for the crackers and cheese, or salami and bread. Put peanut butter on a bagel. Enjoy some dried fruit, like figs, dates, apricots, raisins, etc.
Tip: Stop and care for your feet when you start to feel a “hot spot” where boots and skin are rubbing. Cover it with adhesive tape or moleskin to act as a second skin. This will often prevent a blister from forming.
Safe Crossing
When backpacking, you will often need to cross streams when following trails. Look upstream and downstream to see if someone before you has placed stepping stones, or if there is a sturdy tree that offers a safe bridge. Wide spots in a stream are shallower than narrow ones, so if you’re doing a wet crossing, seek a place that is wide and where there’s not a dangerous drop downstream.
Use a sturdy stick or hiking pole as a third point of contact to help stabilize you as you cross. With a buddy, or even two, you can hold arms to support each other. Only one person should move a foot at a time. This way you maximize your stability on slippery creek bottoms.
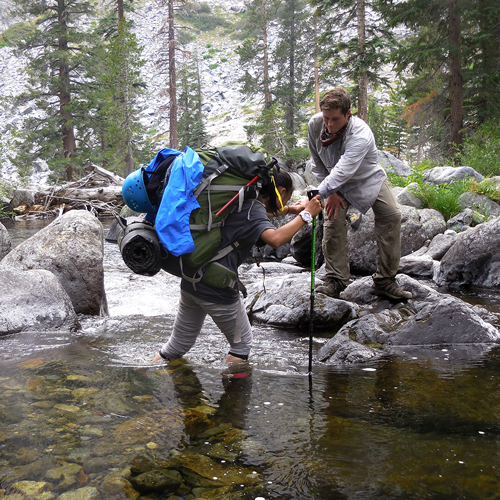
When backpacking, you will often need to cross streams when following trails.
Tip: Unbuckle your hip belt when you cross a stream. That way if you slip, you can easily get out from under the weight of your pack and recover.
Clothing
There is one word that sums up the clothing philosophy for backpacking: layers. Wear a soft thin layer, called a base layer, close to your skin. Avoid cotton unless you’re in the desert. Cotton absorbs moisture and holds it next to your skin, which is fine if you are roasting in the sun, but not fine if it’s chilly and wet out. Add more synthetic or wool layers over that to reach comfortable insulation. Wear lightweight quick-dry pants and take synthetic long johns to wear under them if it’s chilly or wet.
Spare socks are great for camp so you can enjoy dry feet. I like to keep one pair aside just for sleeping, always dry.
Tip: Avoid sweating (and getting chilled when you stop) by removing a layer or two just before starting out. If you start out cool, you’ll soon warm up. Keep those layers handy for the next break.
Navigation
Always keep your map handy and refer to it often so that you know where you are! Note trail crossings and the general direction you are traveling. Be aware of what the terrain should be, according to the map, and compare what you see to what the map says.
Tip: Orient your map by placing the compass along one edge. Turn the map until the map and the compass both point north. This means that the land and the map should match.
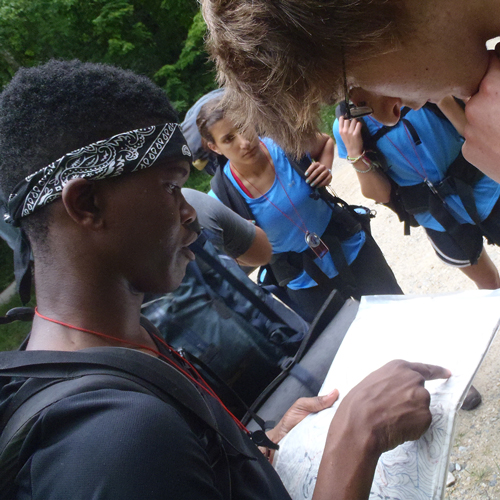
Plan ahead and refer to your map often during your backpacking trip.
Making Camp
Now it’s time to stop and choose a campsite and make it a cozy home for the night. Here are a few questions to consider when you are ready to make camp:
- How far is it to water?
- Are there flat spots for sleeping?
- Is there a fire ring, if you are considering a camp fire?
- If it’s windy, what direction is the wind coming from? Is there a way to orient your shelter to take advantage of any wind break?
- Where will the sun rise? It may offer some warmth in the morning.
- If it rains, where will the water pool?
Consider the best spot from the above considerations and pick your camp for the night.
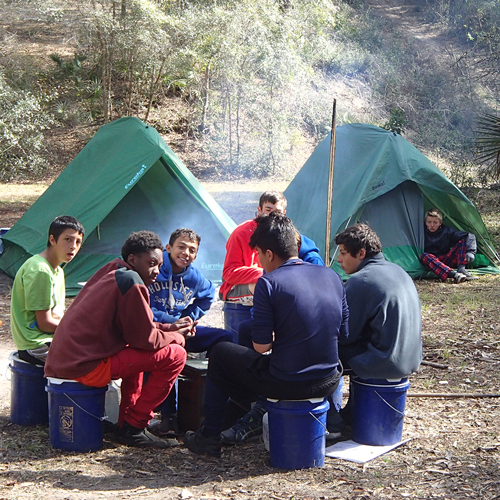
Choosing a campsite wisely will make your backpacking trip a much more enjoyable experience.
Leave No Trace
Notice what kind of shape camp is in when you arrive, and make a commitment to leave it at least as good as you found it. The Leave No Trace philosophy guides us to carry out a little extra trash, to leave trees alone and seek only dead and down wood, to pick up any food traces we drop and to minimize our impact in every way possible. As more and more people enjoy the wilderness, our impacts are cumulative, from soil compaction to cat holes.
Cat hole might be a term you’ve never heard before. One could guess its roots are based on the action of felines as they bury their scat. When you are ready to leave your digested contribution, your human scat, your poop, you might find yourself digging a cat hole. When you do, be sure to walk away from your water source, at least 200 feet out. In some places, where soils have sufficient microbes to break down human waste and toilet paper, you should dig your cat hole 8 inches deep, and be sure you bury your “TP” and deposit well. When you finish covering it with soil, add a layer of leaves and sticks. When you are done, you should ensure that if someone sat down on this spot, they’d never know . . . Also, a good cat hole helps prevent critters in the woods from digging it up. Bury your stuff well for everyone concerned in the wilderness!
In very dry environments, other protocols are used for going to the bathroom. Toilet paper takes a long time to break down in the desert, so it’s appropriate to carry it out. In heavily used camp sites, systems have been created for groups or individuals to carry out their human waste. It’s all about Leave No Trace, and that means caring for the natural world while we’re out on our adventures.
Shelter Me
Tip: Be sure to look up and around you when considering where to pitch your tent. Are there any branches poised to fall to earth in the first wind? These are called “widow makers” for a reason.
Tarps and tents each offer pros and cons. Whichever you are using, look around your campsite for the best location to set up. It’s wise to keep some distance between where you eat and sleep so that the aromas from food, and possible crumbs, don’t attract unwanted guests to your shelter.
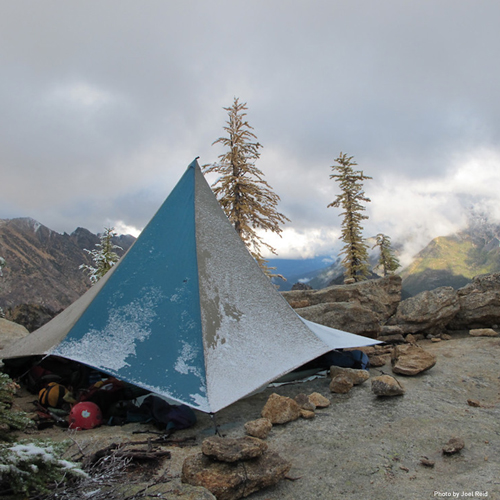
Be sure to look up and around you when considering where to pitch your tent, and also position yourself away from where you eat to protect yourself from unwanted guests in the night.
Tip: Before dark, set up your “bear hang,” the rope to haul your food bag up in the air so that no bear or other local critter helps itself to your edibles.
There’s an art to hanging food from bears. You’ll want to find a horizontal branch which will hold your food at least 10 feet off the ground and 10 feet from a tree trunk. Attach a small rock to the end of the rope and throw it like a ball, up and over the branch. This may take several tries.
When you’ve finished your evening meal, put all scented items and food into one or two stuff sacks or plastic bags (if it might rain), and hoist them up out of reach. Tie off the other end of the rope to a tree.
Some regularly used campsites offer cable systems for hanging food. Look around your campsite to see if this exists. Bears have become increasingly common in areas where backpacking is popular, and it’s almost always a good idea to hang food.
Purify Your Water
There are many different choices for water purification: chlorine tablets, Steri-Pen using UV light or physical filters. Talk to someone at your local outfitter store, and be sure you have a good system, and perhaps even a back up. Clean water is essential, and all water sources must be treated. Keep your water purification system close at hand all day long so that you can easily take advantage of the best water sources.
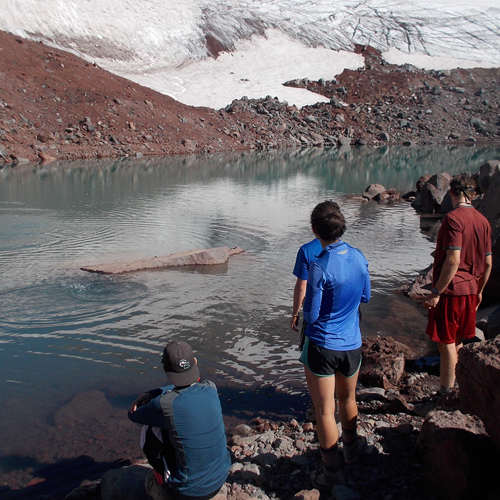
Clean water is essential on a backpacking trip, and all water sources must be treated.
What are good water sources? Ask yourself “Where has this water been?” If its source is deep in wilderness, it’s likely to be cleaner than a large river that has flowed past residential areas or industry. However, any water could have been polluted by animals upstream, whether that be cattle or raccoons. Always purify water unless it’s coming from a dependable faucet!
Sweet Dreams
Belly full, campfire out (if you had one), shelter set up, food hung, water purified for the morning and it’s time to turn in for the night. Under you is your ground cloth or tent, and your sleeping pad for insulation from the cold ground. Snuggle into your sleeping bag, and pull it close around your neck if it’s chilly out. Consider sleeping with some of your clothes in your sleeping bag. They can fill in spaces that can get cold or help insulate your body. Experiment with what works best for you: long johns or not? Hat or not?
Tip: Make a comfy pillow from folded clothes (like a fleece jacket) or a stuff sack filled with soft items. Keep your headlamp or flashlight nearby in case you need to get up in the night.
Learn by Doing
Just like that, you have a quick overview of backpacking basics. You’ll learn lots of tips like this, and much, much more on an Outward Bound course. Instructors have extensive experience and love to share tips to help you become comfortable and competent in the outdoors.
Whether you’d like to learn safe backcountry travel in the desert (Joshua Tree, for example, or the canyon country of Utah), the mountains (Colorado, Alaska or the Northwest) or the Appalachians (from North Carolina to Maine), an Outward Bound course is a great way to get started.
Outward Bound offers backpacking courses in many spectacular wilderness areas all over the continent. On any Outward Bound course, you’ll learn the basics: setting up shelter, firing up your stove, camp craft, navigating with map and compass, cooking in the backcountry and wilderness travel.
You’ll learn by doing, by tying knots and building fires and applying your compass to the forest and mountains around you. You’ll learn how to stay found, how to prevent injury and to Leave No Trace. You’ll learn from experts in the field of outdoor education and make new friends along the way.
Keep reading below for a few helpful backpacking lists to help you prepare.
The Ten Essentials
- Water
- Rain Gear
- Map
- Compass
- Snacks
- Sun hat
- Sun glasses
- Layers of clothing
- Headlamp or flashlight
- Fire starter/lighter or matches
Your Basic Check List: Adapt to your weather and other conditions
- Clothing: base layer, mid layer, fleece jacket
- Quick dry pants, long johns
- Warm hat
- Raincoat
- Bandana
- Sun hat
- Matches
- Water purification
- Map
- Compass
- Water bottles
- Toiletries (sun screen, tooth brush and paste, hair brush, toilet paper, small soap)
- Cup and spoon
- Headlamp and spare batteries
- Ground sheet
- Sleeping pad
- Sleeping bag
- Tent or tarp (with cord)
- First aid (moleskin, bandaids, adhesive tape, antibiotic ointment, ace bandage)
- Repair kit (small amount of duct tape rolled onto pencil, needle/thread, nylon patches)
- Food and hot drinks
- Stove and fuel
- Pot with lid
- Group spoon
- Sturdy cord for bear hang (50 feet or more)
Recommended Reads
Allen & Mike’s Really Cool Backpackin’ Book: Traveling & Camping Skills for a Wilderness Environment by Allen O’Bannon and Mike Clelland
The Green Guide to Low-Impact Hiking and Camping by Laura and Guy Waterman, with forward by Bill McKibben
Ultralight Backpackin’ Tips: 153 Amazing & Inexpensive Tips for Extremely Lightweight Camping by Mike Clelland
About the Author
CJ Wilson re-discovered her love of backpacking after reading Mike Clelland’s Ultralight Backpackin’ Tips. Since her ill-fated first trip at Otter Creek, WV after high school, she mastered the art of backpacking, enjoying adventures from the Appalachians to California’s Sierra and around the world. Her favorite hiking snacks are dried figs with cheddar cheese.
OTHER POSTS YOU MAY LIKE
Read More
Read More
Read More


