Fires are a rich tradition on Outward Bound courses and camping trips, in places where firewood is plentiful. A fire brings a group together to tell stories, share laughter, and reflect on the day. When we gaze into those flames, they can carry us back to something primal, to a timeless place we share with all humans.
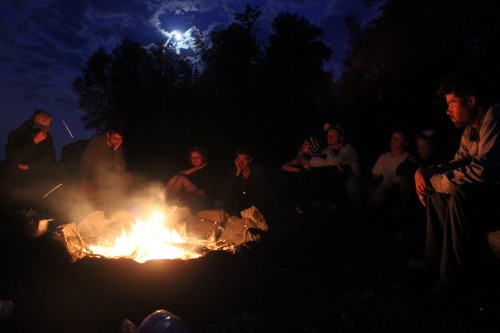
Students warm up around a fire on course with Outward Bound. Photo by Caroline Callahan
On some courses, such as in Minnesota, we often use fires for cooking. On winter courses or in cold environments, fires help keep us warm at the end of the day. They help us dry damp socks and brighten long nights. During the summer months, campfires provide a gathering place to talk and reflect after a long day.
As an Instructor I like to challenge students in two ways if we have a campfire:
- Can you start your fire with only one match? That’s a call to craftsmanship, one of Outward Bound’s four pillars.
2. Can you prepare and enjoy it, then Leave No Trace™ that it was ever there?
Steps to Building a Campfire:
1. Plan Ahead
So, you’re thinking about building a campfire. Where do you start?
Some backpackers carry a small stuff sack with pine pitch, thin shavings or other easily flammable material, for easy lighting. If you are depending on a fire in wet weather, this is especially useful. Consider carrying a small pouch of easy-to-light tinder.
Ask yourself, “Is it safe and appropriate to have a fire?” If it is windy and dry out, it might not be a good time for a fire. If you are traveling in a dry area where very little vegetation grows, campfires might use up a scarce resource faster than the ecosystem can generate wood.
2. Leave No Trace
If a fire ring exists at your campsite, it’s best to use it, rather than damage a new spot.
If there is no existing fire ring, you have a chance to practice Leave No Trace™ philosophy. There are several methods for doing this. You can dig a circle the size of your fire (about two feet), and place the top soil, which is alive with microorganisms, aside on top of a ground cloth.
Or you can build a mound fire, where you gather mineral soil (sand, or soil from an uprooted tree) and place that on top of a ground cloth, about four inches deep. The mound will protect the living top soil, and the plastic helps make cleanup of the fire site easy.
Keep water handy in case a spark or small coal leaves the fire area, and to put the fire out before you turn in.
3. Gather Your Wood
If you organize your tinder and kindling, it will help ensure success. You won’t be out scavenging for small sticks while your fire is dying before it even gets going.
- Be sure you only take dead and downed wood, preferably a short distance away from your campsite, so that you spread out the impact of your gathering.
- Wood that is light and snaps easily indicates that it’s going to burn well. Wood that is wet is heavier. Wood that is green bends and doesn’t snap. It is still alive and won’t burn well.
- Look for large branches which have fallen, and whose sticks haven’t been on the ground gathering moisture. They’ll be the driest and easiest to work with.

Gather the largest branches into a pile.
4. Organize Your Kindling Into Piles
Pile #1: Separate out the smallest twigs, the size of matchsticks and smaller. Make a pile of these, with more than you think you’ll need, at least six inches tall.
Pile #2: Make a pile of sticks that are pencil thickness and smaller. Once a flame gets going, you’ll feed the flames with these and get some heat going.
Pile #3: Your third pile will be sticks no larger than the thickness of your thumb. These will feed the flames once the pencil-sized sticks get going, and start to build coals as they burn.
Pile #4: This should include larger sticks, up to 4-5 inches. These are your long-burning sticks. You may end up using something larger, but remember that logs take a long time to burn, and you’ll need to be sure your fire is completely out before you can turn in for the night. You may need to haul water, too, in order to completely put out the fire. Overall it’s a good idea to conserve resources and keep the fire small.

Organizing your kindling into piles based on size.
Once you’re sure you have a good supply of starter wood, ask at least one fellow crew mate to join you as you light the fire. Put the tinder down, with a small structure of pencil-sized sticks around and above it. They can be stacked log cabin style, or like a teepee, so that they give the tinder air to burn. A solid mass of wood doesn’t burn as well as wood with plenty of air to breathe.
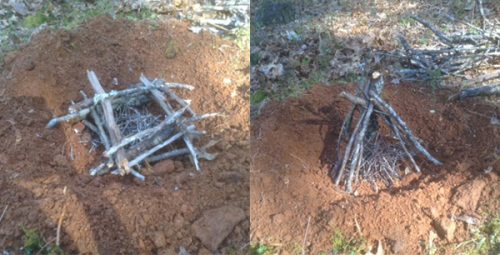
Build either a log cabin and teepee structure with your kindling.
Challenge #1: Can you light this fire with just one match? This is easier to do with really dry wood, but not impossible with damp fuel.
Light your pile of tinder, and be sure someone is ready to blow gently on it if the flame weakens. Immediately feed the flames with more tinder, and start to add sticks that are slightly larger than matches from the next pile. Wherever there are flames, gently place sticks.
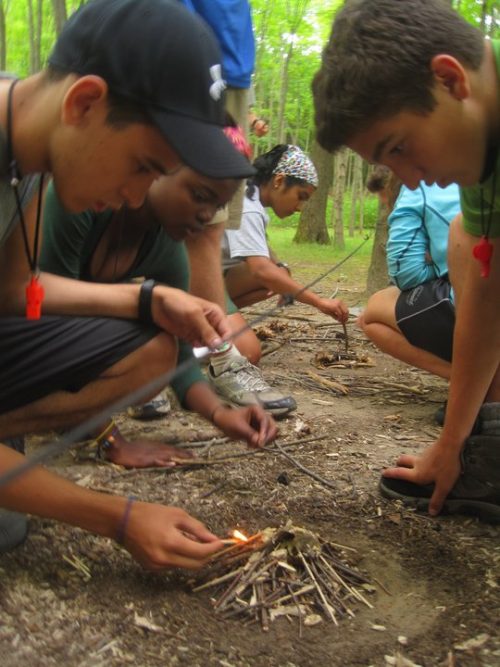
Students practice building a fire in the Delaware Water Gap.
Remember to create air space for the fire to breath. Keep blowing steadily on the base of the fire if it looks shaky. Fire needs plenty of air to thrive. (That’s why it’s so dangerous to build a fire in high wind — it can easily get out of control and spread.) This is when it’s helpful to have a buddy when starting a fire. You can take turns feeding the flames and blowing to encourage it.
You can probably guess the next step. Once the pencil-sized sticks are catching well, start adding in the thumb-sized sticks. If the wood isn’t super dry, you may need to keep blowing on it for a good while, but once it really gets going, it will have enough energy to dry any slightly damp wood that you put on.
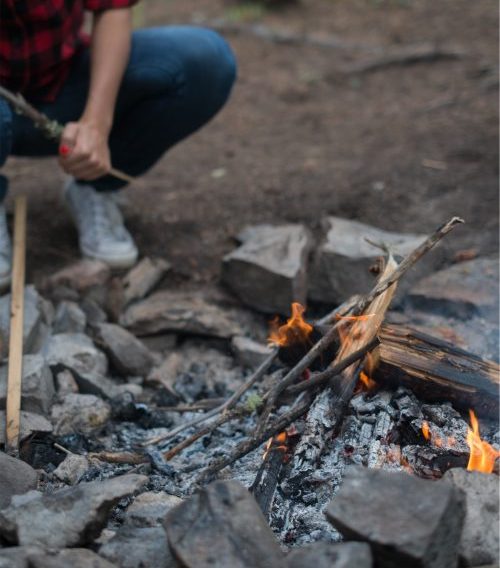
Continue adding sticks to grow the fire.
And if it’s not catching, you know what to do! Give it air, air, air!
5. Put It Out Cold
As the fire dies down and you’re ready to turn in for the night, be sure to put the fire completely out. Pour water over the few remaining coals, and stir it into the ashes with a stick, until there is no heat left. It should be out cold when you leave it for the night.
Challenge #2: Leave No Trace. In the morning, it’s time to leave the site as if you had never had a fire there. Ideally you burned all your wood until it was just ashes, and avoided burning logs that left charred chunks. If there are small coals (cold ones) you can spread them out in the forest. Return the topsoil you had placed aside, or if you used the mineral soil or sand, put it back where you found it.
What else can you do to leave this spot as you originally found it? Maybe you need to fluff up some leaves on the spot. Step back and admire your work. Congratulate yourself if there is no trace that a group ever enjoyed a fire on this spot!
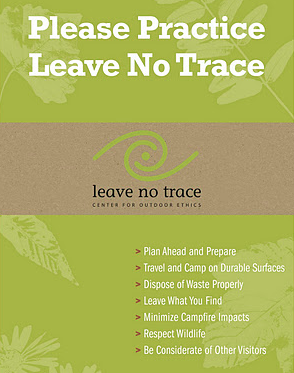
The 7 Leave No Trace Principles
It’s not always appropriate and safe to build a fire. In dry climates, there may be a shortage of wood, and it might be best to enjoy the darkness of the night sky, or the bright light of the moon. If it’s dry and windy, fires can be dangerous. Millions of acres of public lands have burned because of careless campers who let their fire get away, and with dry conditions in high winds, it’s easy for that to happen. So there are times to enjoy stories or talk about the day around a few candles.
But if all the factors line up, and it’s a good night to cook over a fire, or to gather around one at the end of the day, it can be magical and memorable.
Just be sure it’s out cold before you mosey on over to your sleeping bag and wander into dreamland!
For information about Outward Bound expeditions, or to learn about our rich selection of summer activities, go HERE, or call 866.467.7651 to reserve your spot on an expedition today.
Sign-up for our newsletter to keep up on course options, resources, and special offers.
About the Author

CJ Wilson
CJ Wilson has lived, traveled and worked in many Outward Bound course areas, from Patagonia to the Pacific Northwest, and Maine to the Sierras. When not touring on her bicycle or exploring new places, she can be found writing from the Outward Bound base camp in Asheville, NC.
OTHER POSTS YOU MAY LIKE
Read More
Read More
Read More


